Connect ChatGPT to AgentDock
Use web ChatGPT to operate files, run commands, manage Git, use browser automation, or drive coding tools on your computer.
Connecting web ChatGPT requires:
- AgentDock accessible via a public HTTPS address.
- OAuth enabled on AgentDock.
- Connecting from ChatGPT using the public MCP URL and OAuth password.
The graphical installer for Windows and macOS automatically configures Cloudflare tunnels and OAuth.
Quick setup (Windows / macOS graphical app)
First, install AgentDock following the Windows installation or macOS installation guide.
1. Choose a public connection mode
When choosing connection options during setup or configuration:
- If you do not have a domain yet, select Temporary public address.
- If you have a custom domain managed by Cloudflare, select Fixed domain.
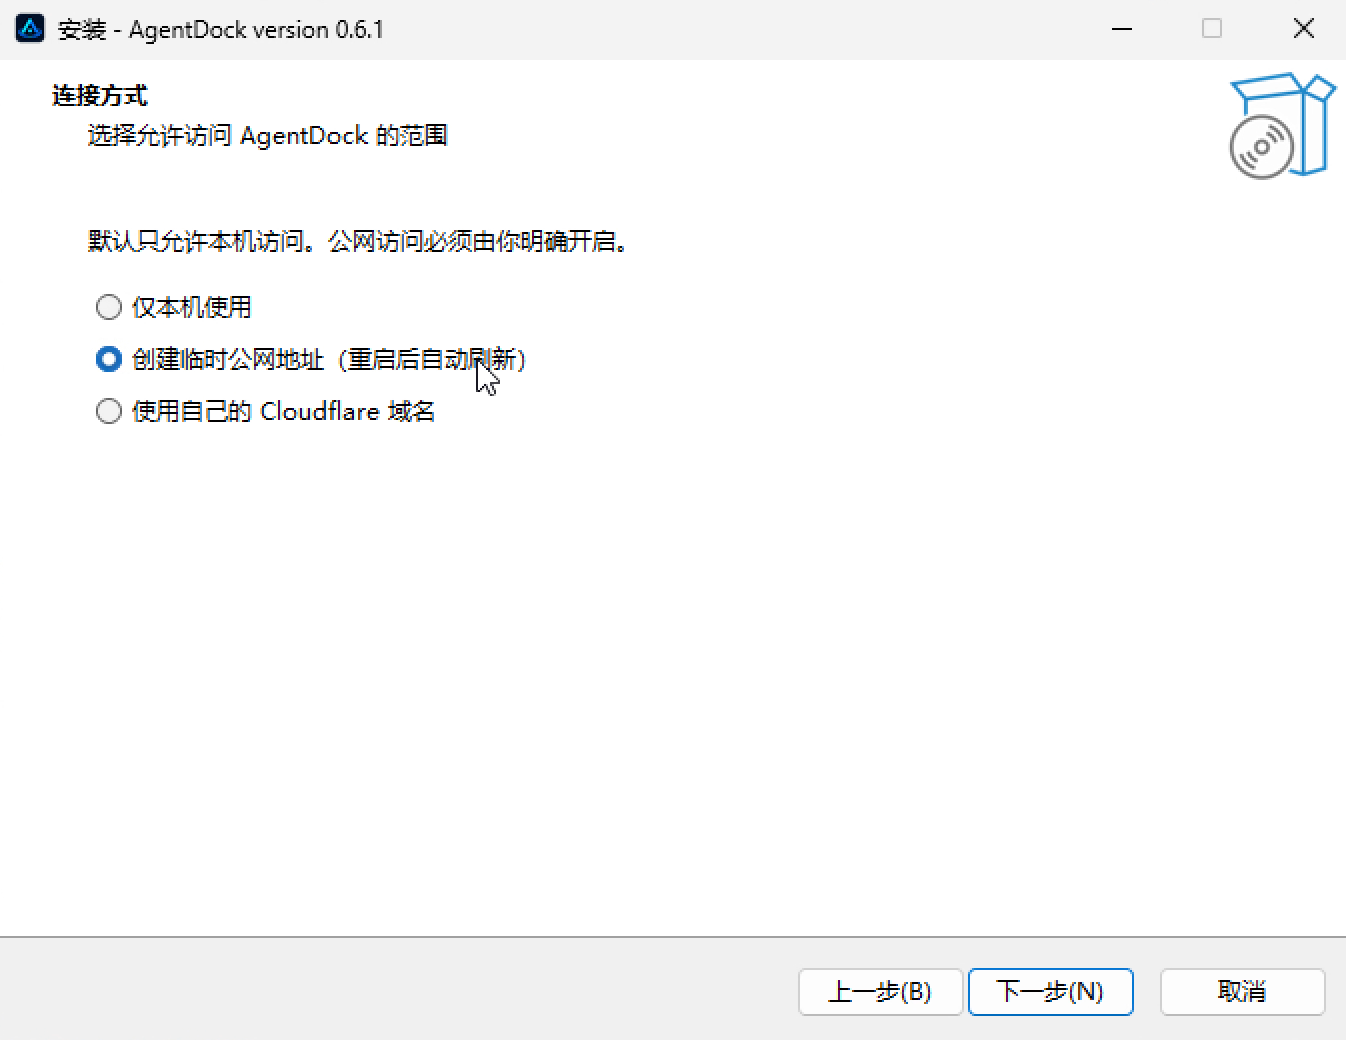
A temporary trycloudflare.com address is sufficient for quick setup and testing. Temporary URLs may change after a restart; copy the new URL from the control panel and update the ChatGPT plugin if it changes.
2. Copy public URL and OAuth password
Open the AgentDock Control Panel and wait until the status shows "Healthy".
In the Overview tab, copy:
- Public MCP URL (ends with
/mcp) - OAuth password
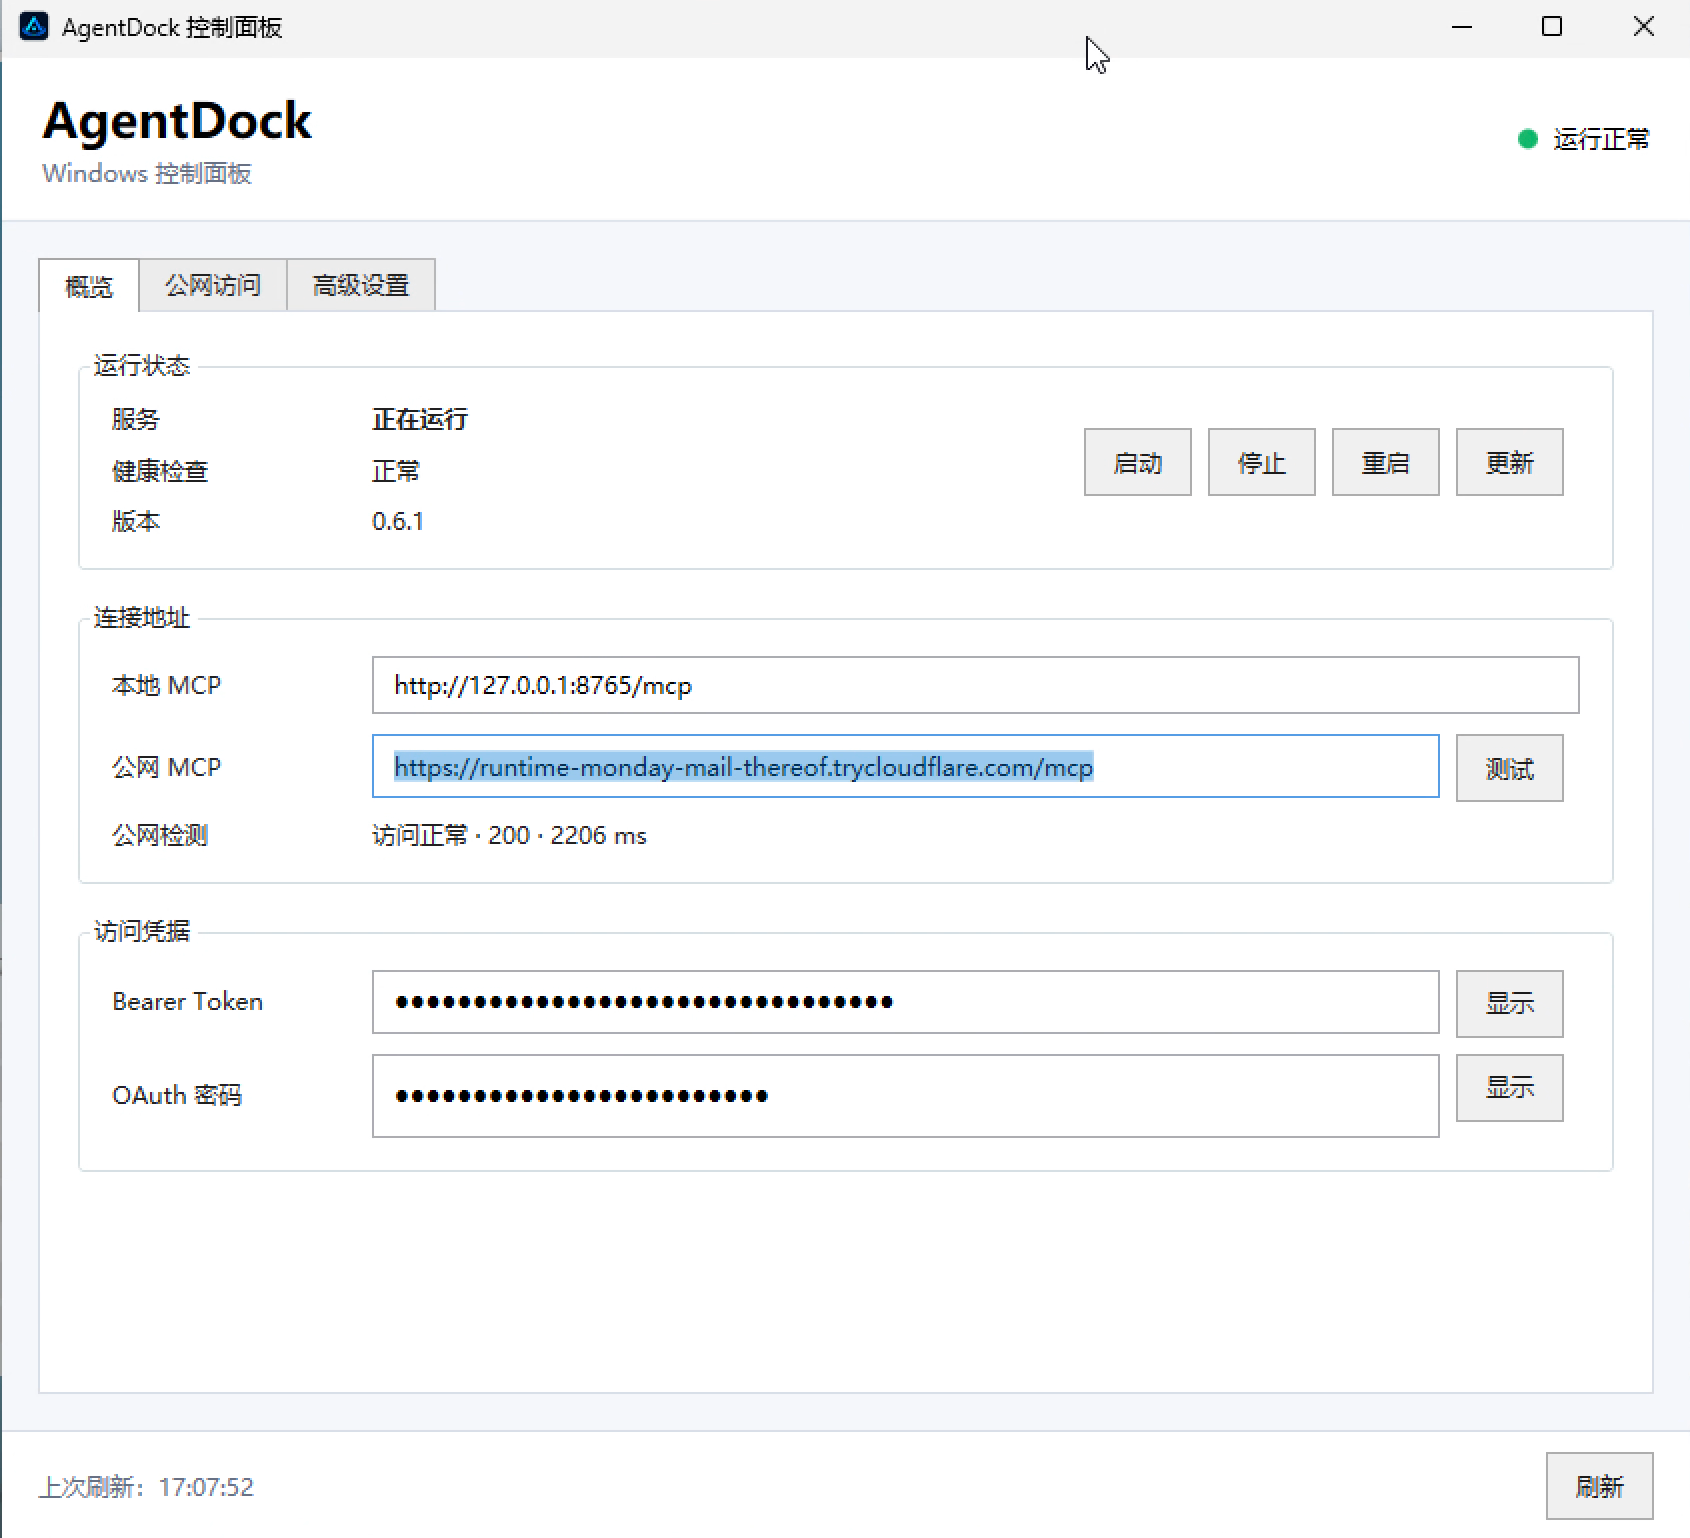
Credentials are masked by default; click "Show" when needed. Do not share the password in screenshots, issues, or public chats.
Do not enter local http://127.0.0.1:8765/mcp into ChatGPT. ChatGPT cannot reach loopback addresses on your computer.
3. Create plugin in ChatGPT
- Open ChatGPT in your browser.
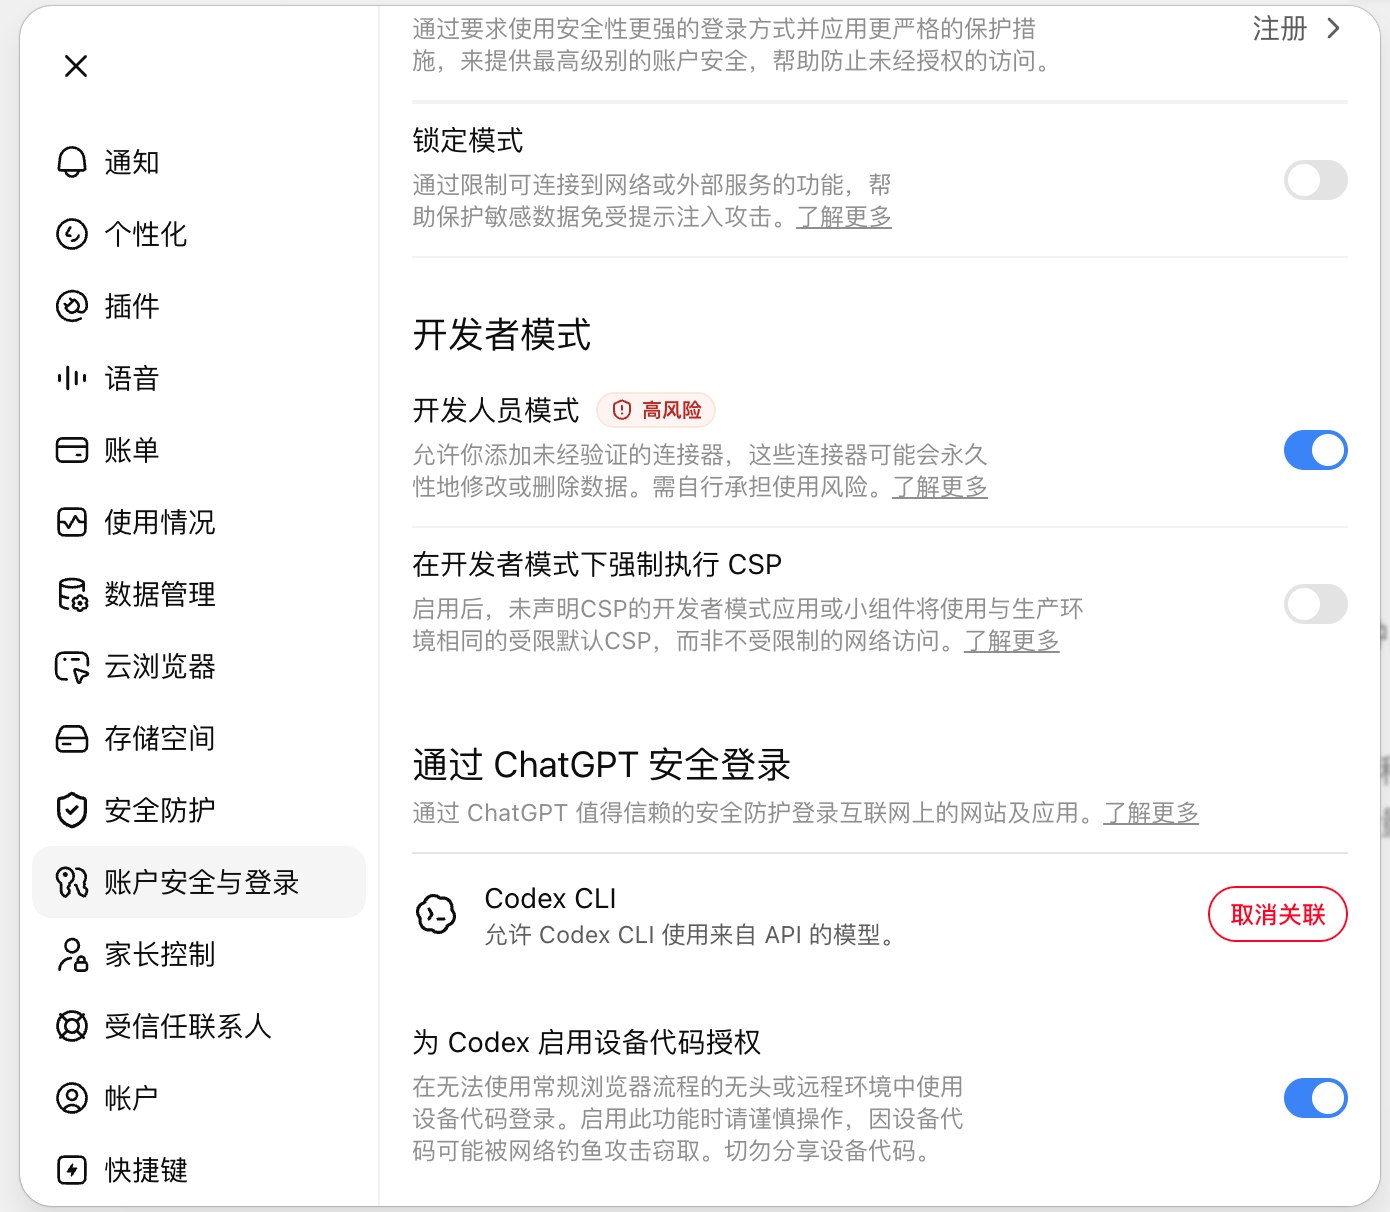
- Go to Settings > Plugins > Advanced settings and enable Developer mode.
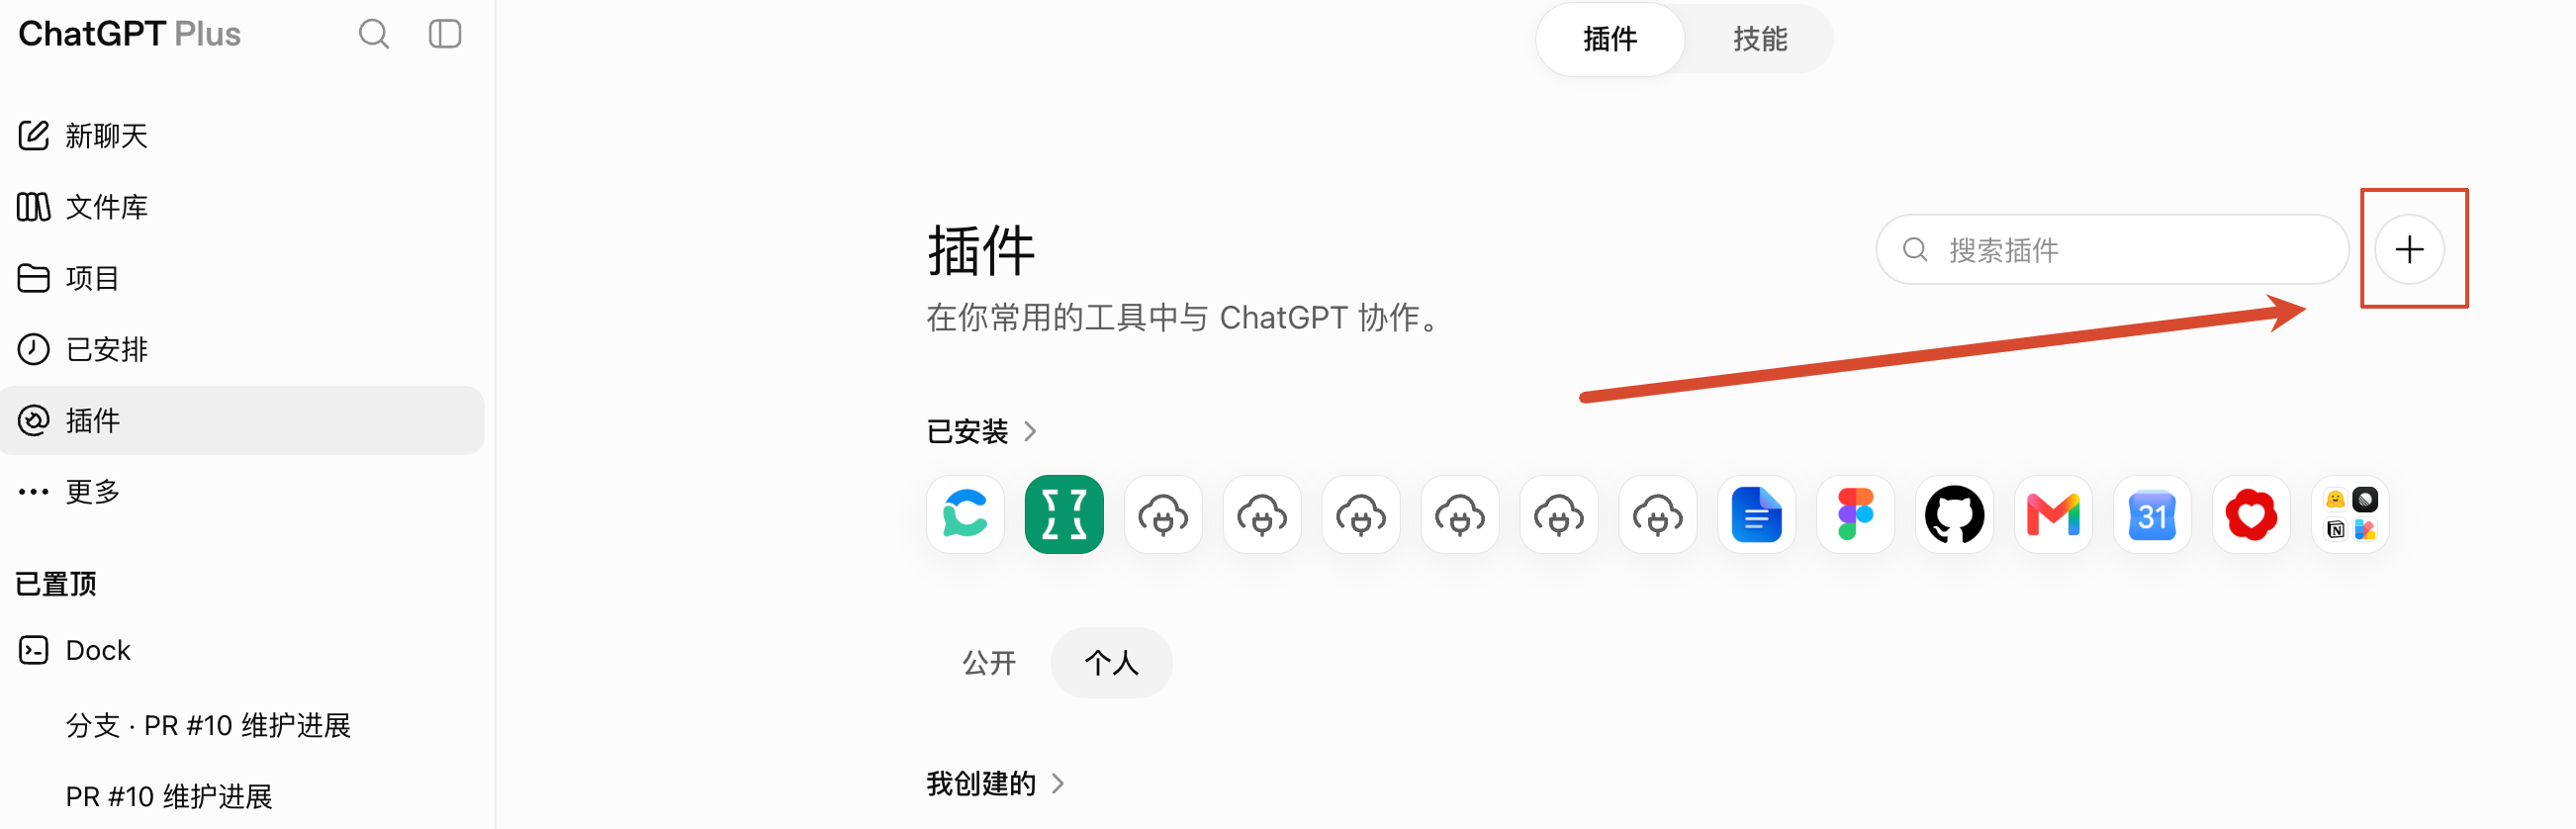
- Return to the plugins view on the ChatGPT home page and click ➕ / Create plugin.
-
Set plugin name to
AgentDock. -
In MCP Server URL, paste the public URL you copied, for example:
https://your-public-host.example/mcp
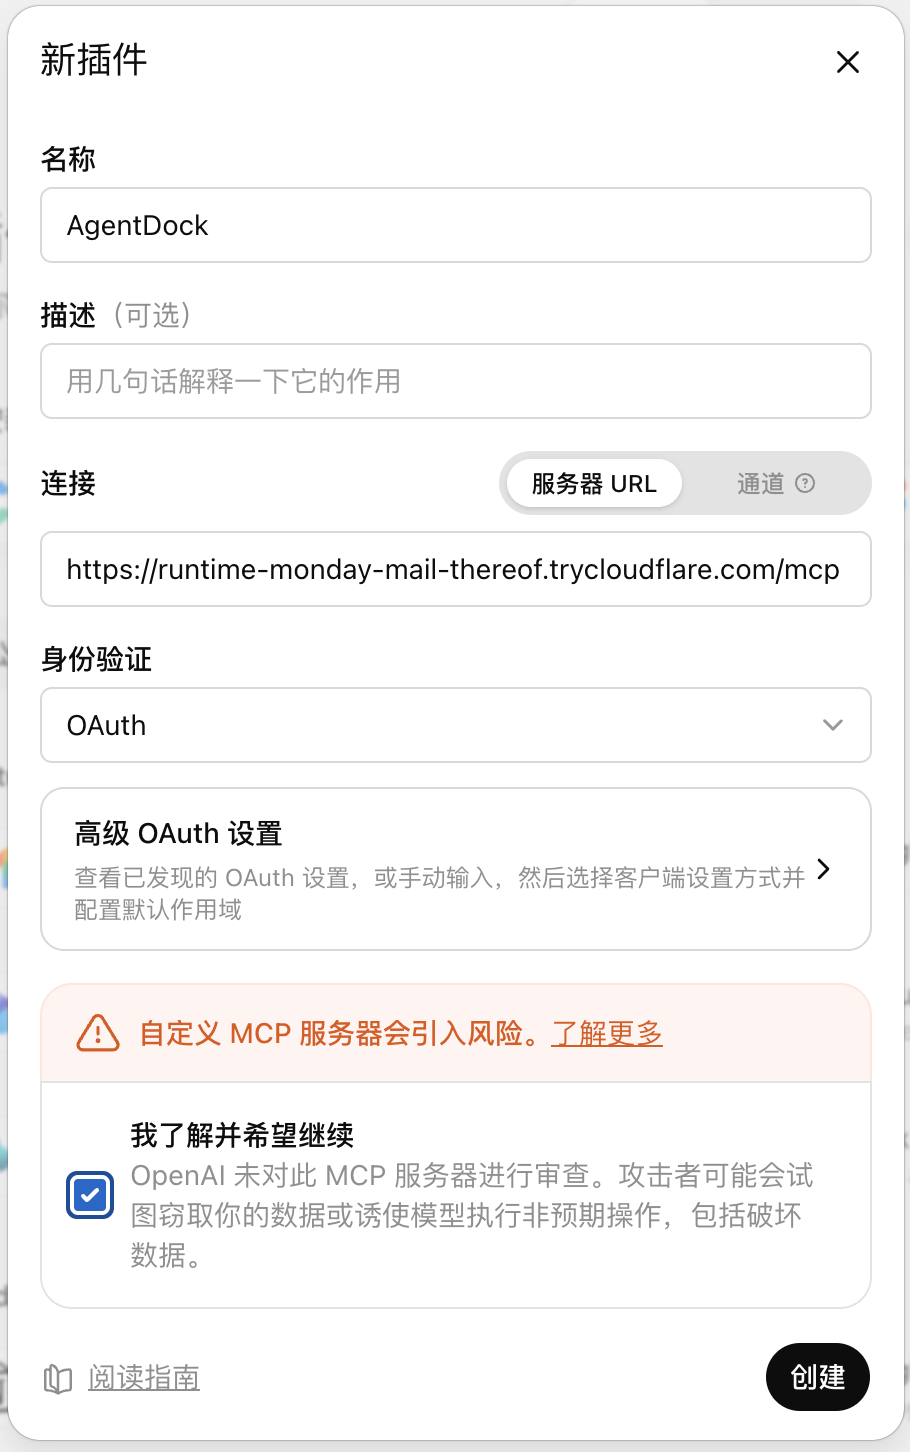
- Click create and initiate connection.
- When redirected to the AgentDock authorization page, enter your OAuth password and authorize.
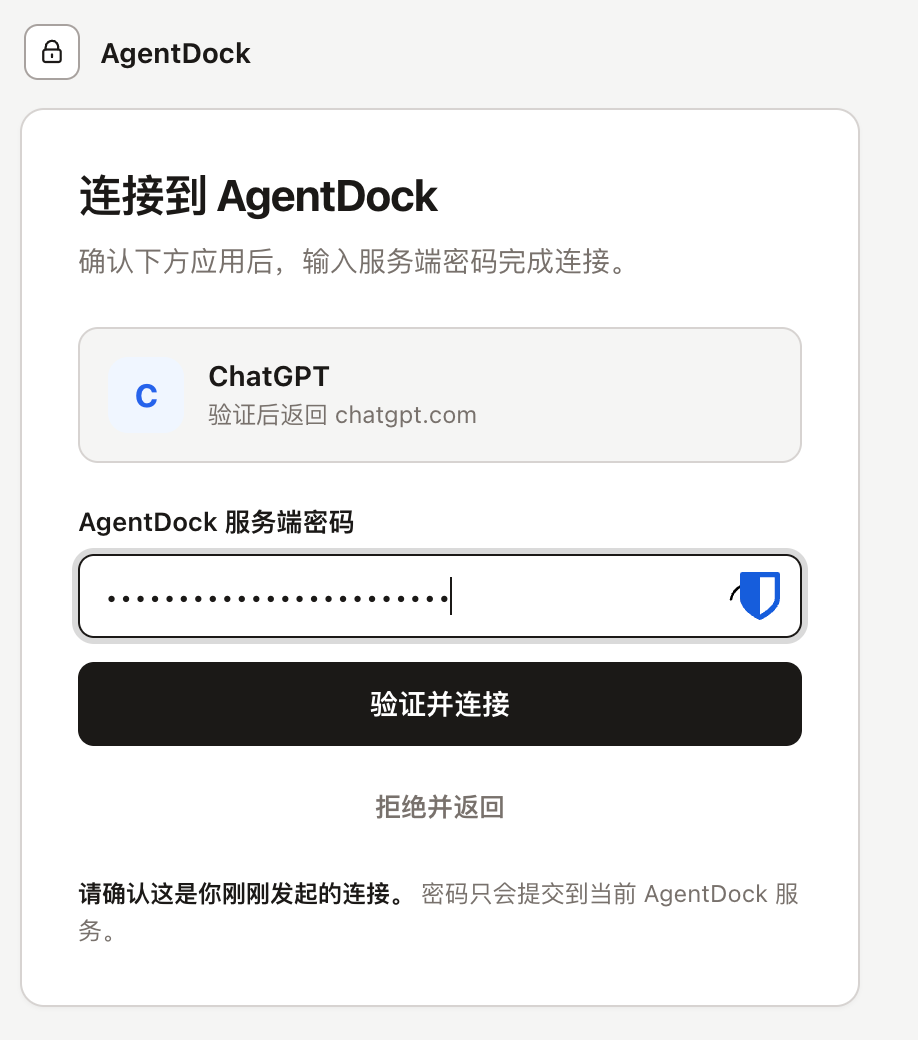
- Return to ChatGPT and verify that the AgentDock plugin is available.
ChatGPT automatically discovers AgentDock's OAuth metadata, registers the client, and authorizes via the browser. You do not need to manually configure Client ID, Client Secret, authorization URLs, or token endpoints.
4. Verify the connection
Start a new conversation in ChatGPT and try:
Use AgentDock to check current device info.
Or run a read-only verification:
Call AgentDock's agentdock_context and tell me the AgentDock version, OS, path model, and currently available Skills and dynamic MCP capabilities.
Ensure ChatGPT lists AgentDock tools and completes an actual tool call.
Once connected, ChatGPT can install Skills, connect external MCP servers, control browsers, or drive local coding agents.
Server and manual deployment
When deploying AgentDock on a Linux VPS, server, Docker container, or behind a custom reverse proxy:
- Public HTTPS access: AgentDock must be accessible via a public HTTPS URL with a valid certificate.
- MCP URL format: The public endpoint must end with
/mcp(e.g.https://agentdock.example.com/mcp). - OAuth enabled: OAuth must be enabled with
AGENTDOCK_OAUTH_ENABLED=true,AGENTDOCK_SERVER_URL,AGENTDOCK_OAUTH_PASSWORD, andAGENTDOCK_OAUTH_TOKEN_SECRET. For the full environment variable dictionary and key generation instructions, see OAuth configuration. - Proxy routing: The reverse proxy must forward
/mcp,/register,/oauth/*, and/.well-known/*.
After updating the environment configuration, restart AgentDock (e.g. sudo systemctl restart agentdock or docker compose up -d).
For a step-by-step VPS setup guide, see Manual Linux deployment.
Verify OAuth endpoints
Verify health check and OAuth metadata endpoints:
curl -fsS https://agentdock.example.com/healthz
curl -fsS https://agentdock.example.com/.well-known/oauth-authorization-server
curl -fsS https://agentdock.example.com/.well-known/oauth-protected-resource/mcp
The second request should return JSON containing:
authorization_endpoint  https://agentdock.example.com/oauth/authorize
token_endpoint          https://agentdock.example.com/oauth/token
registration_endpoint   https://agentdock.example.com/register
Do not visit /oauth/authorize manually in a browser; it expects parameters supplied by ChatGPT during authorization.
Troubleshooting
Not redirecting to authorization page
Check:
- MCP URL ends with
/mcp. - Public access is enabled and ChatGPT uses the public URL shown in the control panel.
- In manual deployments,
AGENTDOCK_OAUTH_ENABLEDistrue. AGENTDOCK_SERVER_URLmatches the actual browser HTTPS origin./.well-known/oauth-authorization-serverand/.well-known/oauth-protected-resource/mcpare accessible publicly.- Reverse proxy allows
/register,/oauth/authorize, and/oauth/token.
Page hangs after authorization
On successful authorization, POST /oauth/authorize returns a 302 redirect to ChatGPT's callback URL. If the browser does not redirect, check reverse proxy logs and browser network tabs for rewritten Location headers.
Incorrect password error
Enter the OAuth password from the control panel (or AGENTDOCK_OAUTH_PASSWORD), not the Bearer Token or AGENTDOCK_OAUTH_TOKEN_SECRET. Consecutive failures trigger temporary rate limiting.
Connection still fails after changing settings
After restarting AgentDock, verify public endpoints, then delete the plugin in ChatGPT and recreate it to avoid stale client registrations.
If using a temporary public URL that has changed, update the MCP URL in the ChatGPT plugin first.
Security recommendations
- Use a fixed domain with valid HTTPS certificates for long-term deployments.
- Store authorization passwords and token secrets only in protected environment files or secret managers.
- Never expose credentials in README files, Compose files, chat logs, or screenshots.
- Ensure reverse proxies do not log Authorization headers, OAuth codes, or request bodies.
- AgentDock operates with the permissions of its runtime user or container; grant only necessary directory and command access.
For full environment variable details, see Configuration reference. For public server deployments, see Manual Linux deployment.